
If you want to install WordPress on your computer without using XAMPP or WAMP, then Laragon is one of the best and fastest tools. In this tutorial, I’ll show you step by step how to install WordPress with Laragon using the Quick App feature (Blue Elephant Icon).
This is the written guide of my YouTube video. At the end, I’ll embed the full tutorial video so you can watch the complete process in action.
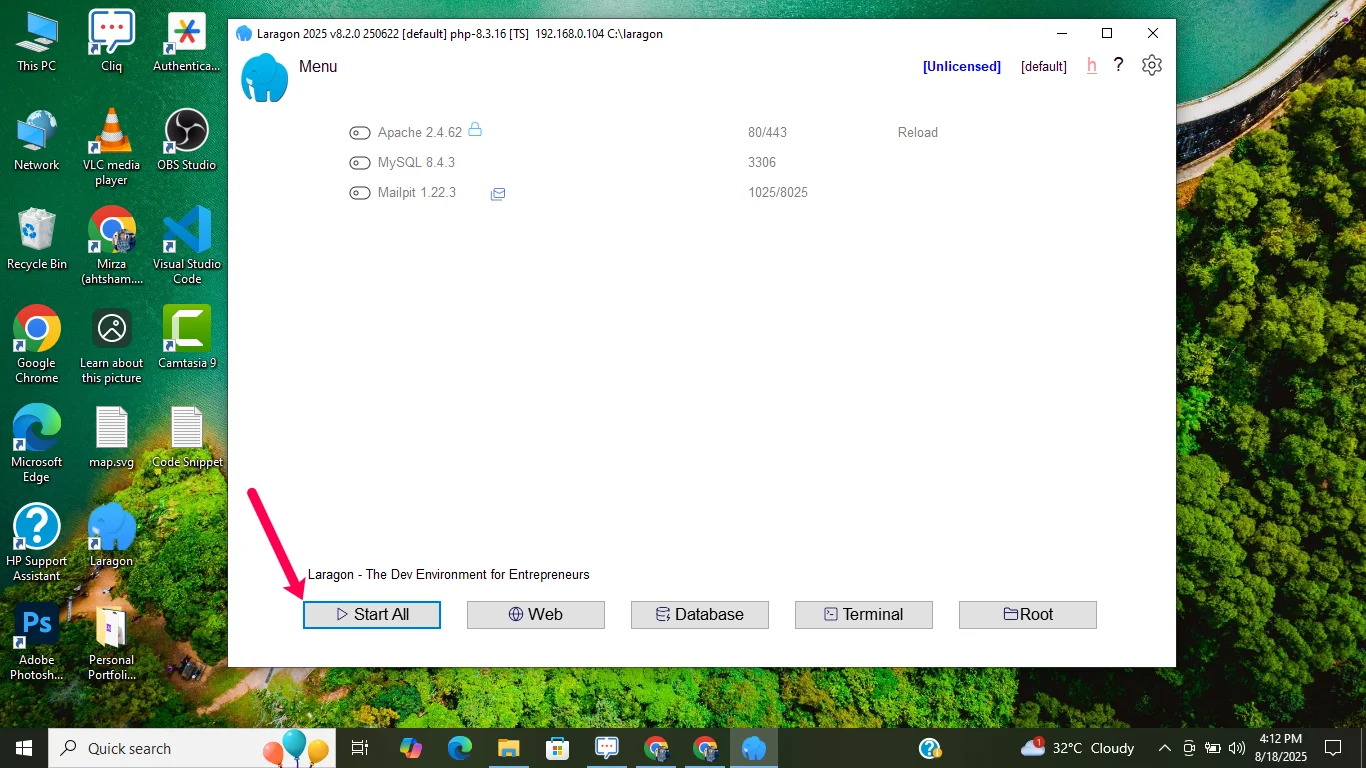
Locate the Laragon icon (blue elephant) on your desktop and double-click to open.
Click the Start button inside Laragon to activate Apache and MySQL.
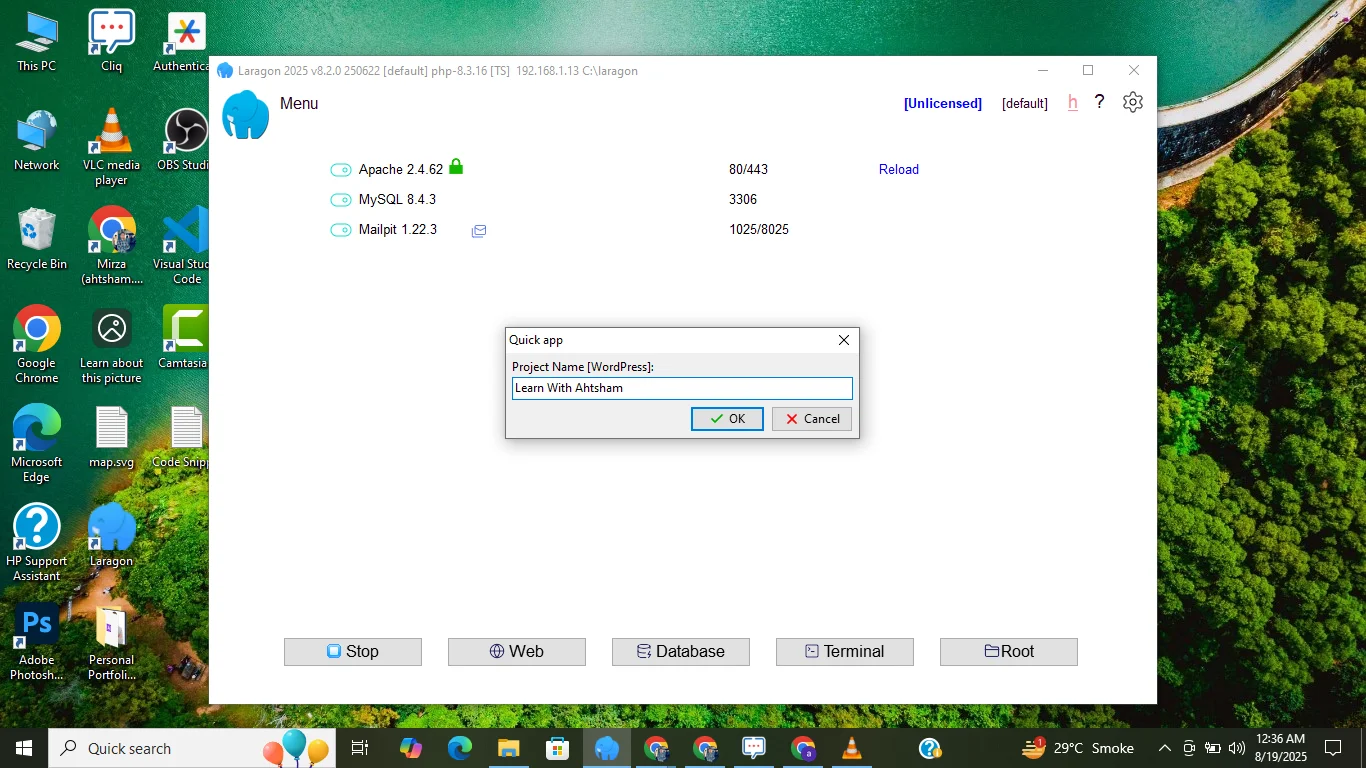
3. Enter your project name (e.g., “Ahmed Portfolio” or “Web Designer Portfolio”).
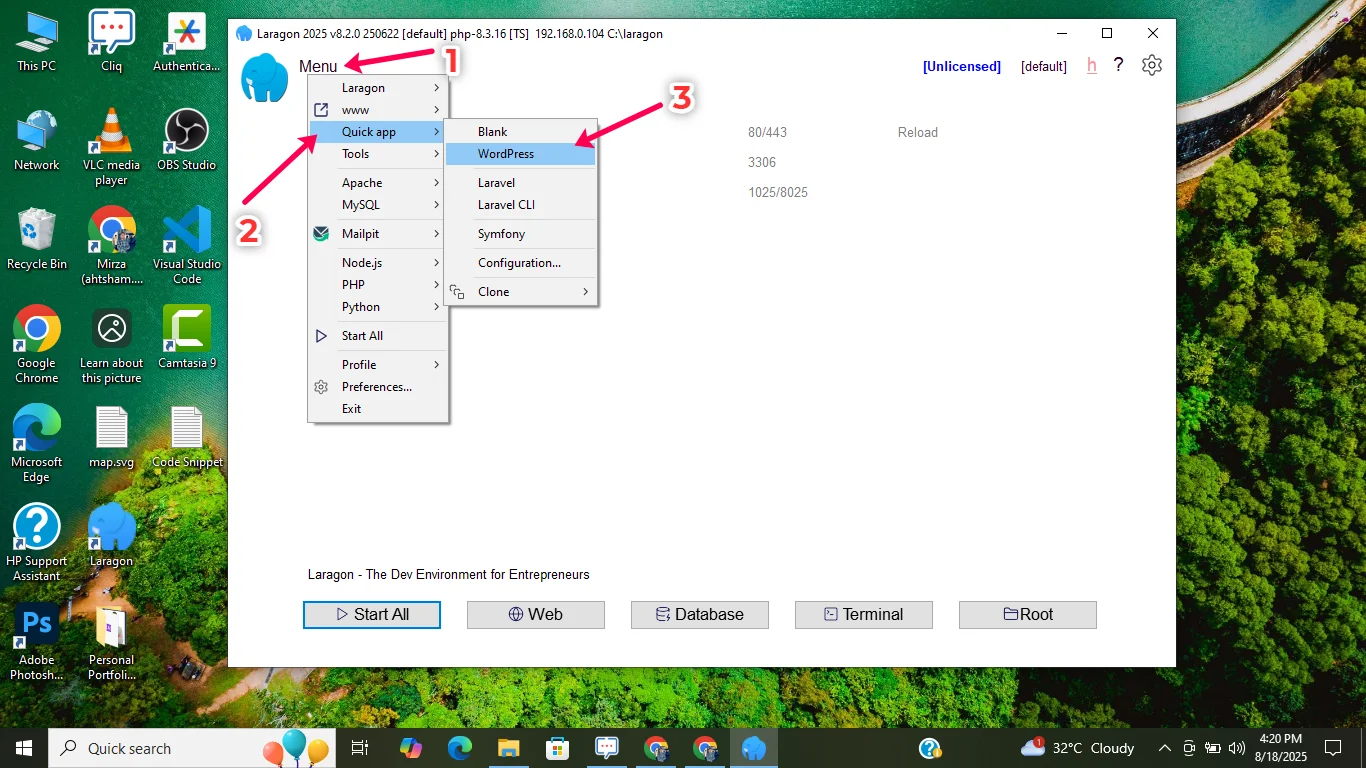
Click Start. Laragon will automatically create all the files and database.
During setup, Laragon will ask for SSL and related permissions. Click Allow to make your WordPress site secure.
Wait 2–5 minutes until the installation is complete.
Type your project URL in the browser:
Example: https://yourprojectname.test/wp-admin/
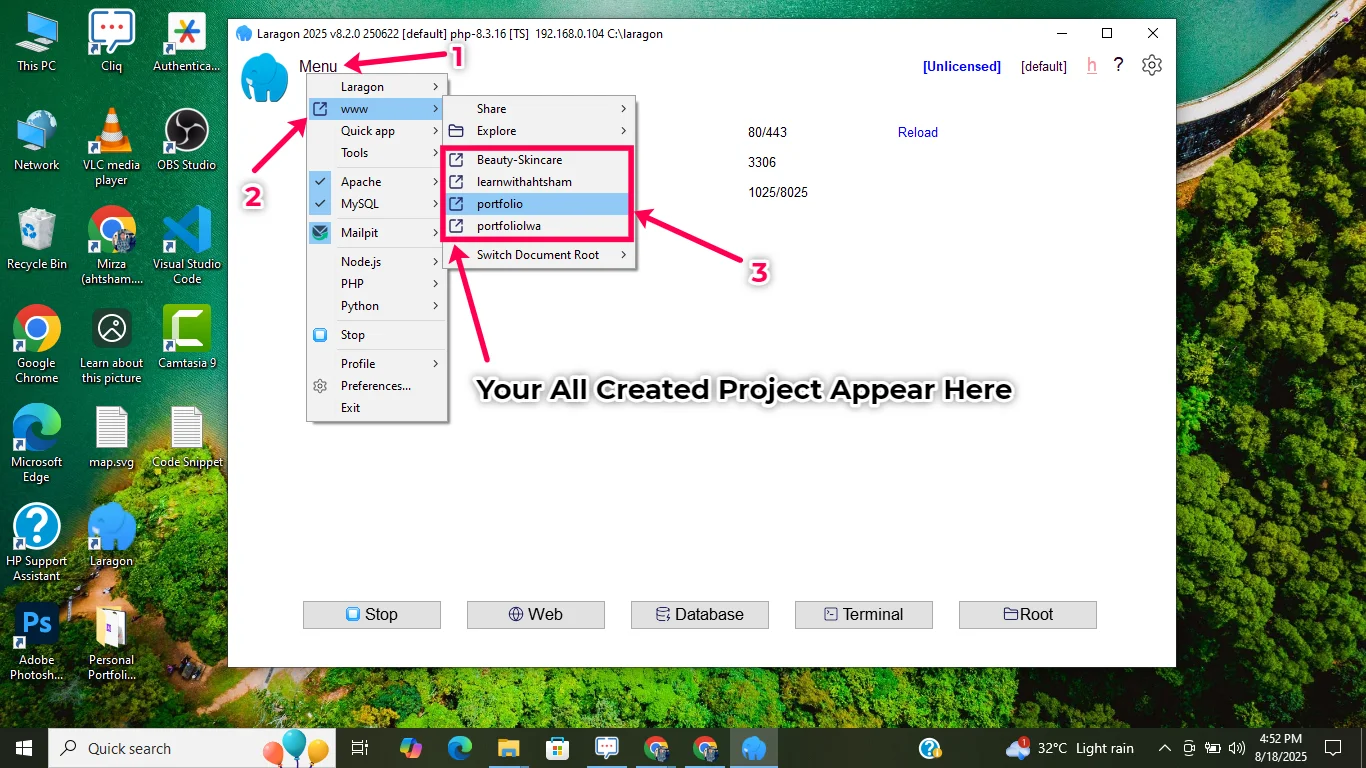
You can Open the Porject By Searching in Laragon. As Following in The Image Below.
Choose your language and click Continue.
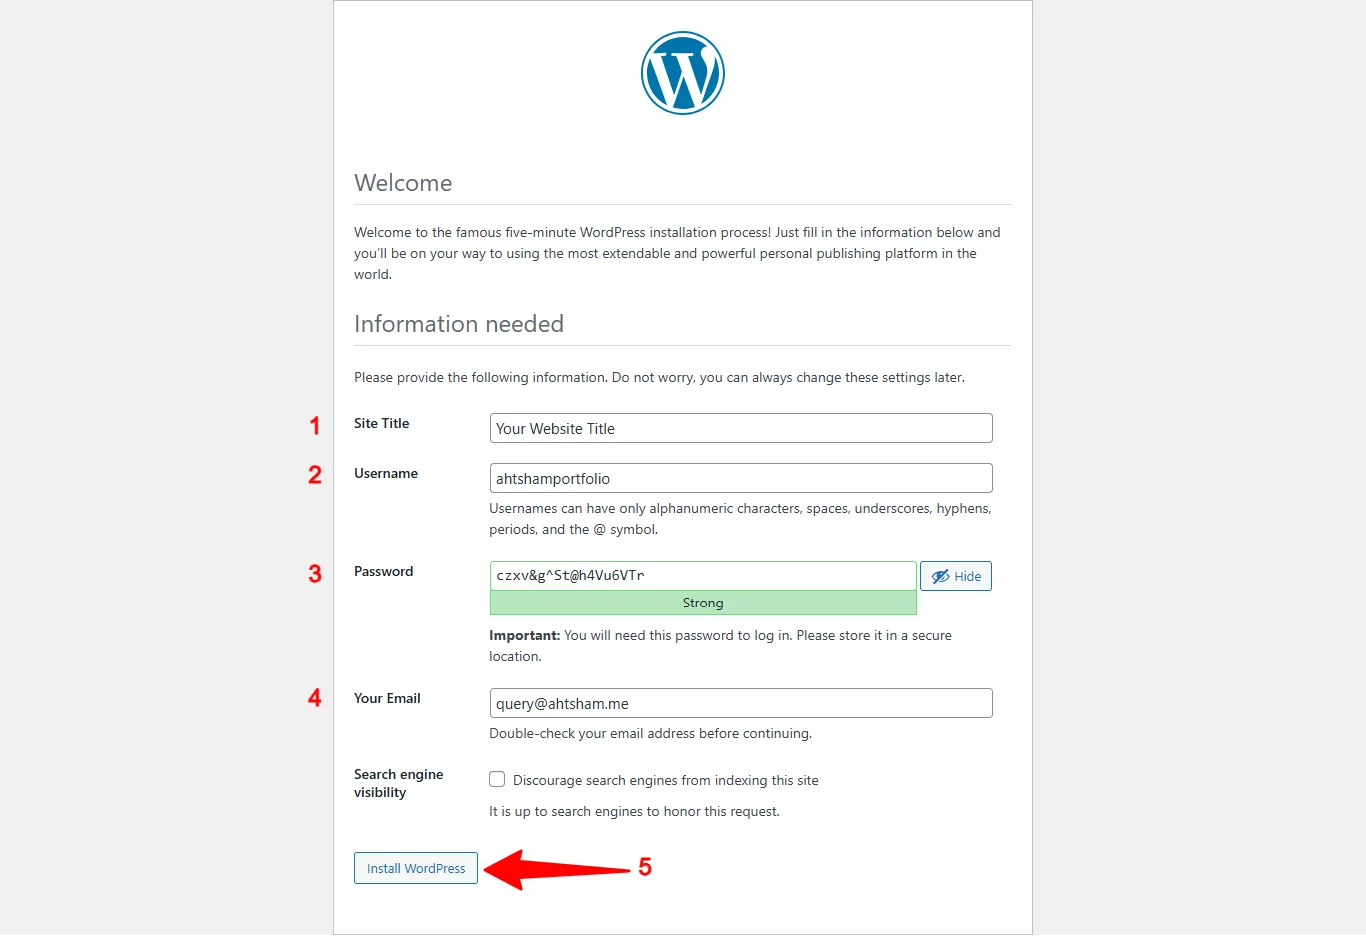
Click Install WordPress.
Choose your language and click Continue.
Fill in the required details:
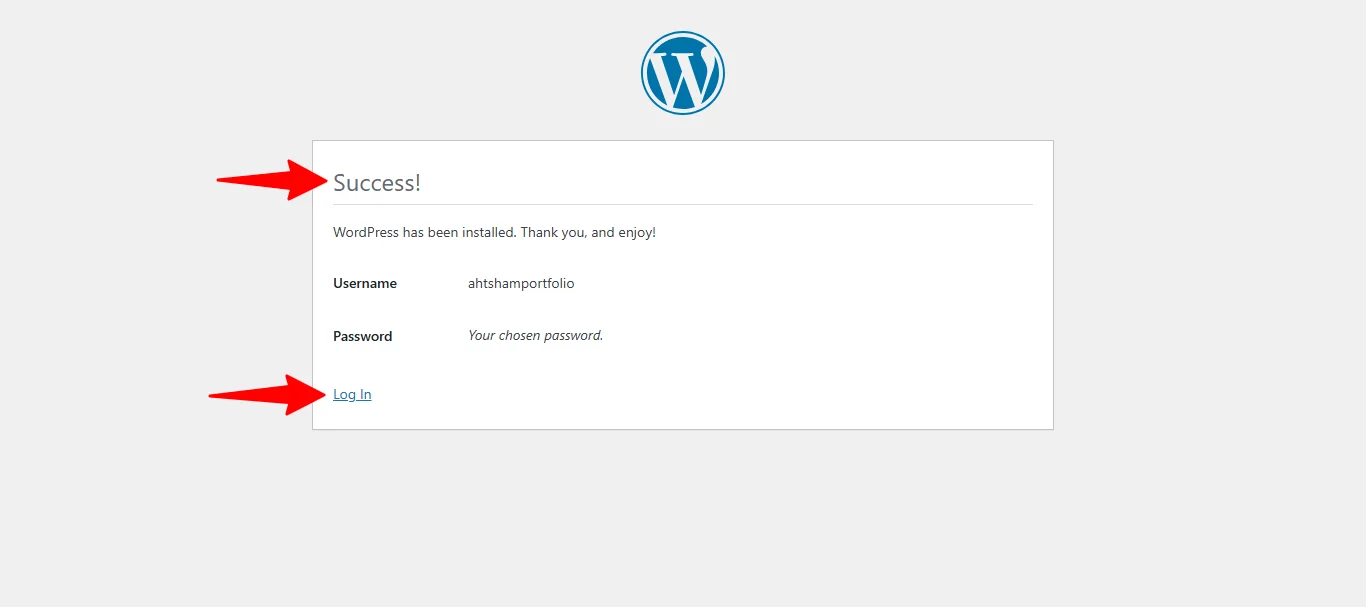
Once installation is complete, you’ll see a success message.
Now log in with your username and password.
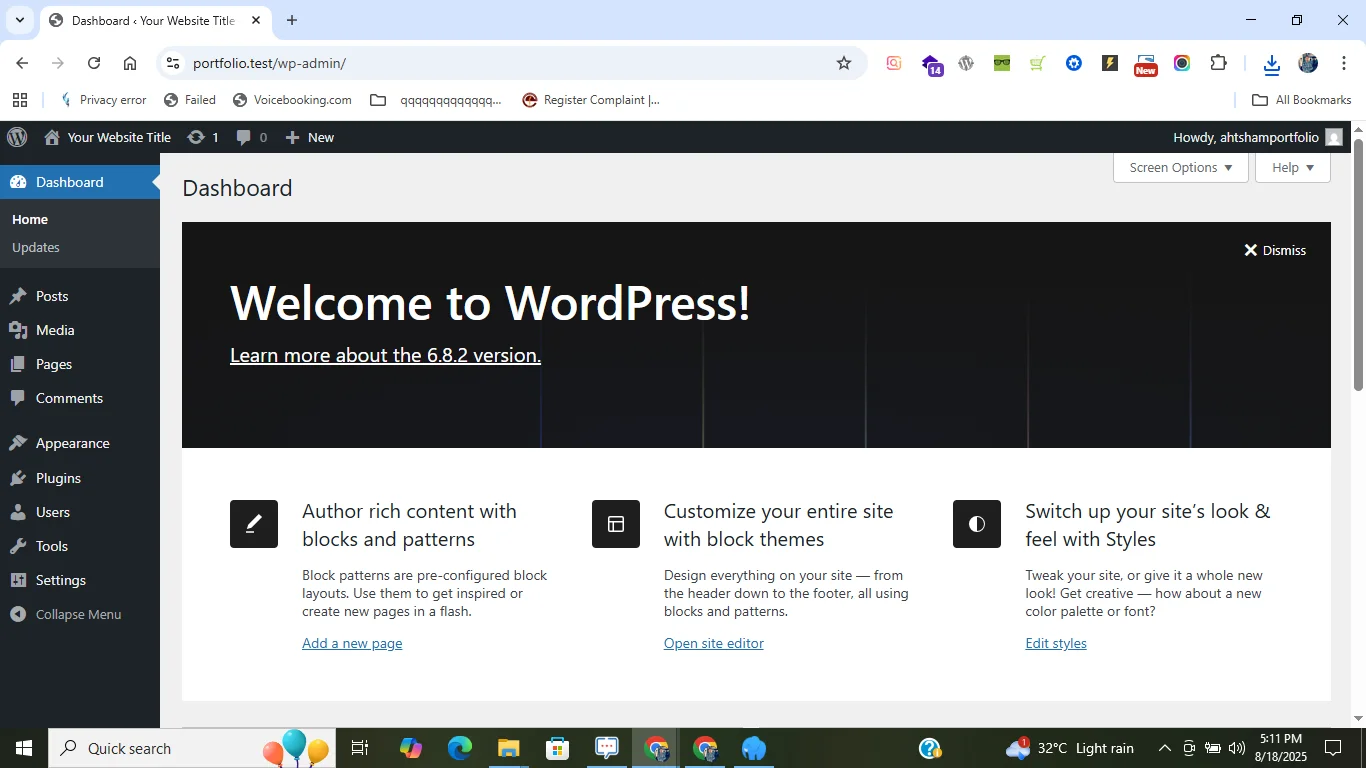
Congratulations 🎉! You have successfully installed WordPress using Laragon on your PC. Now you can start customizing your website, install themes, and build your first project.
Now log in with your username and password.
How to Install WordPress with Laragon on PC (Step by Step Guide)
2025 Copyright © Learn With Ahtsham. Developed by Web Design Genius.