How to Create a Portfolio Website in WordPress (Free Elementor Guide)

Editorial Note: We may earn a commission when you visit links on our website.
Meet Mirza Ahtsham – Your Guide to Web Design & Development (6+ Years Experience)
Assalam-o-Alaikum! My name is Mirza Ahtsham, and I’m excited to welcome you to my new learning platform, Learn with Ahtsham. With over 6 years of experience in Web Design and Development, I have worked on hundreds of successful projects using WordPress, Shopify, and Custom Coding.
This article is a written version of my first YouTube introduction video, where I share my journey, vision, and the purpose of this channel. If you prefer watching, you can scroll down and watch the full video tutorial embedded below.
- i - My Journey in Web Design & Development
Like many of you, I started my career from scratch — without resources, guidance, or clear direction. Over time, I learned, practiced, and built skills in WordPress, Shopify, HTML, CSS, and JavaScript. These skills helped me complete hundreds of projects for clients worldwide.
Now, my mission is simple: to help students like you build skills that companies actually hire for.
- ii - The Purpose of This Channel
Many students think the ultimate goal is only freelancing. But freelancing is just one option. If you develop strong technical skills, you can:
I want you to become not only a web designer or developer but also a problem solver. Because in the real world, employers and clients value solutions, not just technical knowledge.
- iii - What You’ll Learn from My Tutorials
In this free learning series, I’ll guide you step by step, starting from zero to advanced level, covering:
- iv - Motivation for Beginners
If you’re starting today, remember: I was once in your place. With hard work and consistent learning, I was able to grow — and so can you!
How to Create a Portfolio Website in WordPress: Step-by-Step Guide
- Step 1: Install WordPress on Your PC with Laragon
- Step 2: Install Elementor Plugin & Hello Elementor Theme
- Step 3: Create a Custom Header with Elementor
- Step 4: Design the Hero Section of Your Portfolio Website
- Step 5: Build the About Me Section with Elementor
- Step 6: Design Portfolio & Call-to-Action (CTA) Section
- Step 7: Create a Blog Section in Elementor
- Step 8: Design Testimonial & Happy Clients Section
- Step 9: Add a Contact Form with Contact Form 7
- Step 10: Build a Custom Footer for Your Portfolio Website
Step 1: Install WordPress on Your PC with Laragon
If you want to install WordPress on your computer without using XAMPP or WAMP, then Laragon is one of the best and fastest tools. In this tutorial, I’ll show you step by step how to install WordPress with Laragon using the Quick App feature (Blue Elephant Icon).
This is the written guide of my YouTube video. At the end, I’ll embed the full tutorial video so you can watch the complete process in action.
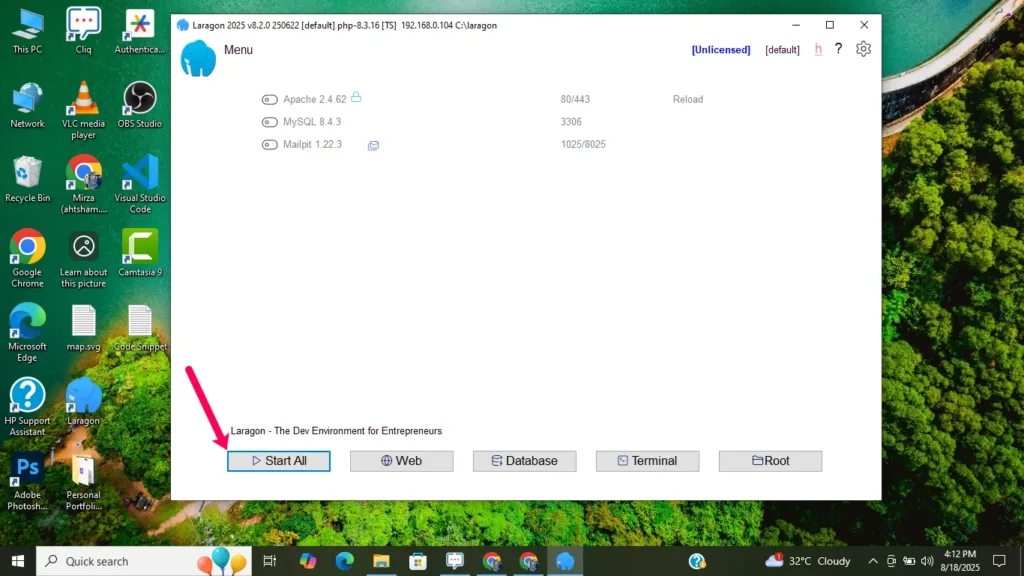
- i - Open Laragon
Locate the Laragon icon (blue elephant) on your desktop and double-click to open.
- ii - Start Laragon Services
Click the Start button inside Laragon to activate Apache and MySQL.
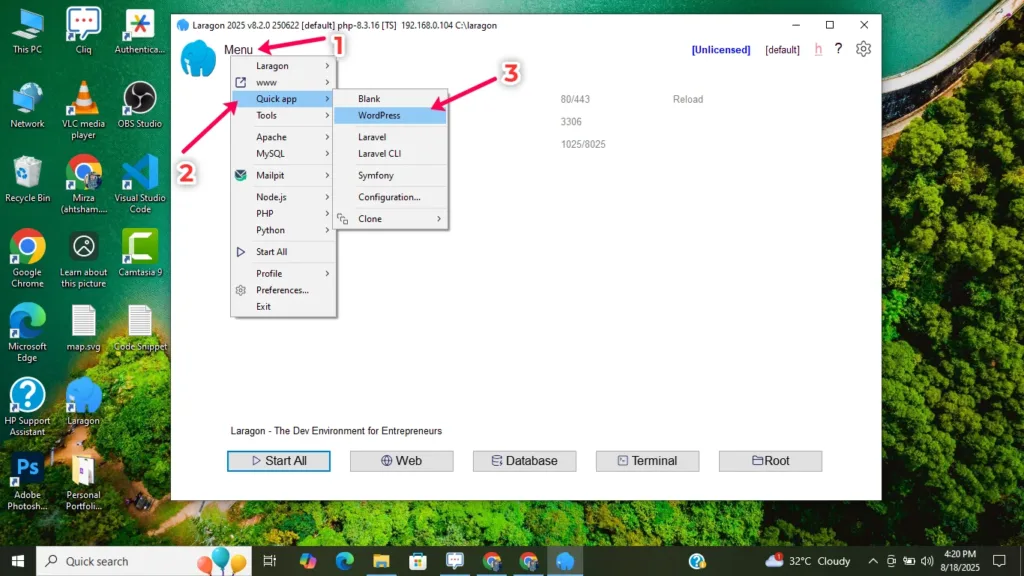
- iii - Create a New WordPress Project
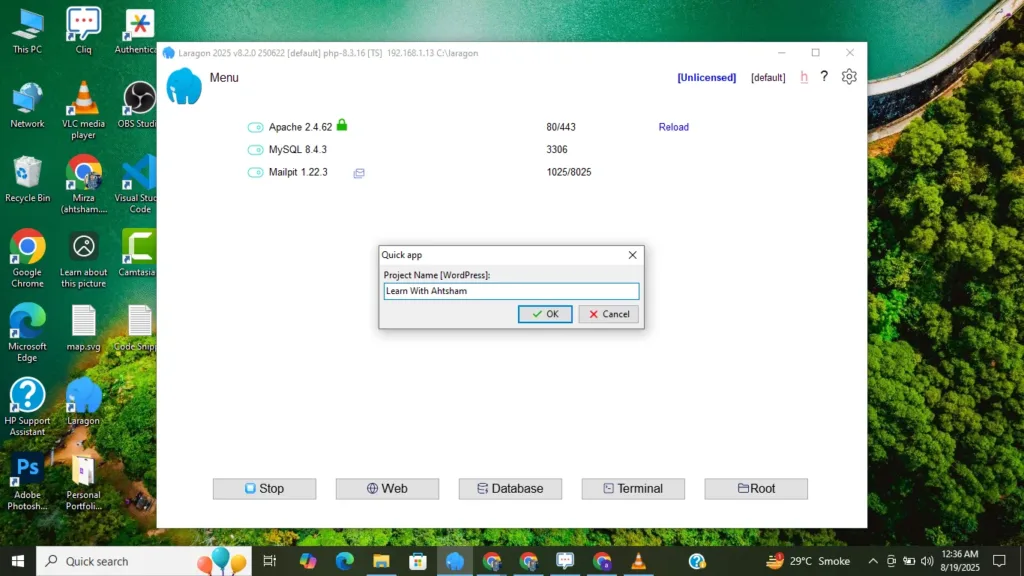
- iv - Allow SSL Setup
How to install WordPress With Laragon on PC | Step by Step Guide
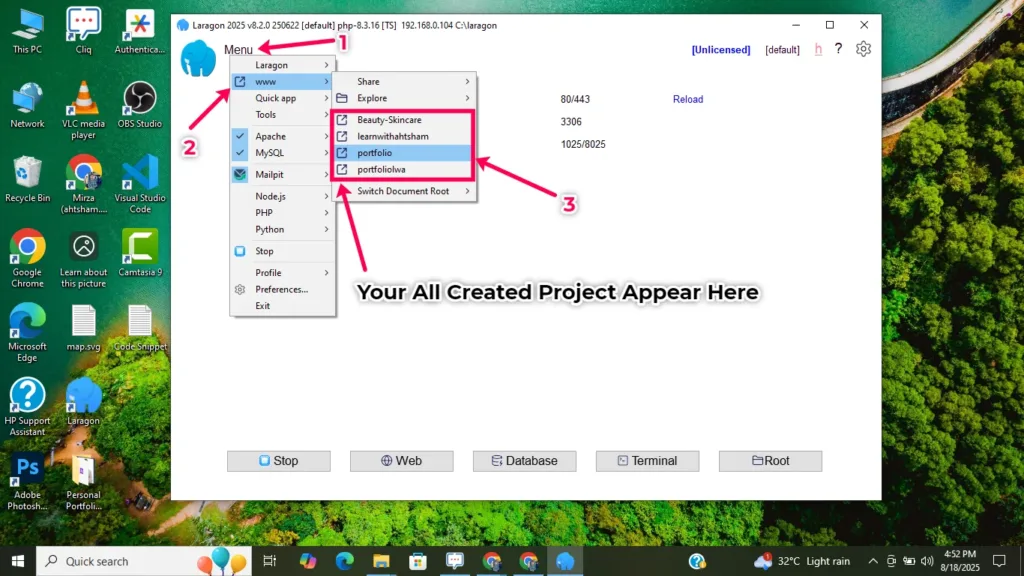
- v - Open Your Project in Browser
Type your project URL in the browser:
Example:
https://yourprojectname.test/wp-admin/
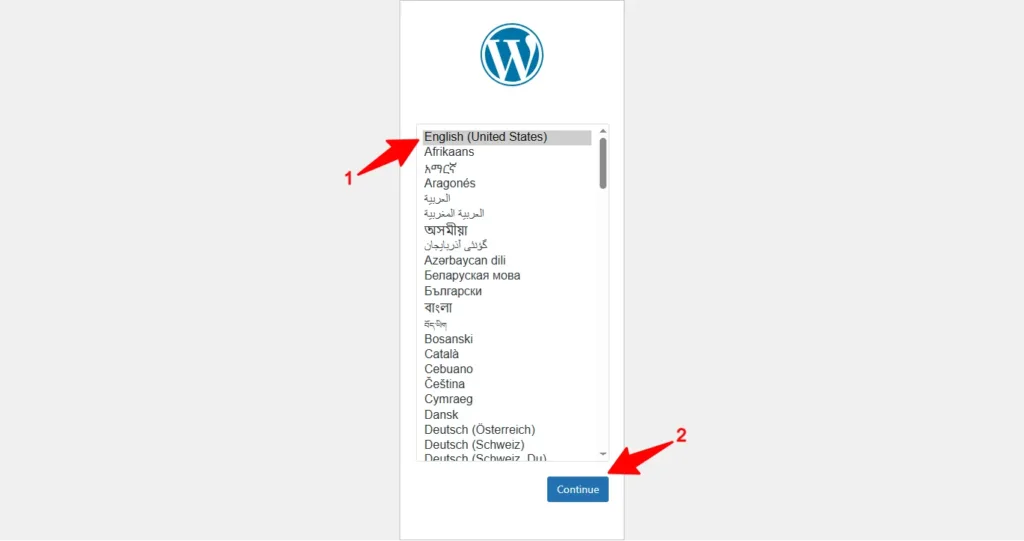
- vi - Select WordPress Language
Choose your language and click Continue.
- vii - Add Website Information
Fill in the required details:
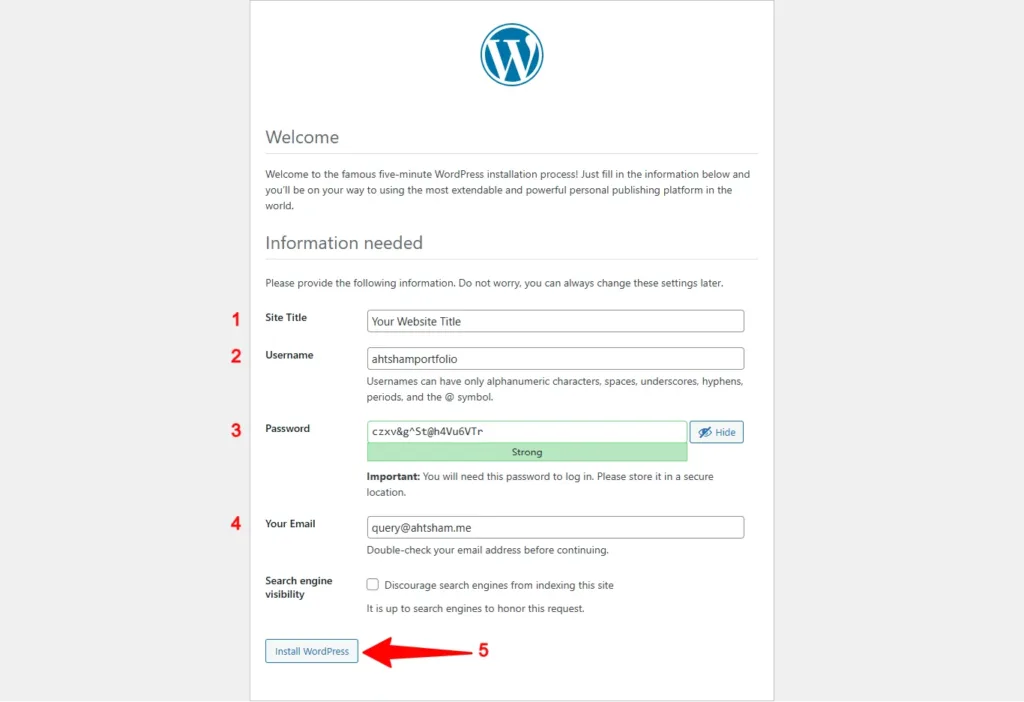
Click Install WordPress.
- viii - Installation Success
Once installation is complete, you’ll see a success message.

Now log in with your username and password.
Congratulations 🎉! You have successfully installed WordPress using Laragon on your PC. Now you can start customizing your website, install themes, and build your first project.
Get Fee Audit
Step 2: Install Elementor Plugin & Hello Elementor Theme
If you want to start building a professional website with WordPress, the Hello Elementor Theme and Elementor Plugin are the best starting point. In this guide, I’ll show you step by step how to install Hello Elementor Theme along with some essential plugins including Elementor Free, Ultimate Addons for Elementor, and WPForms Lite.
This is the written version of my YouTube tutorial. Scroll down to see screenshots of each step and watch the full video embedded below.
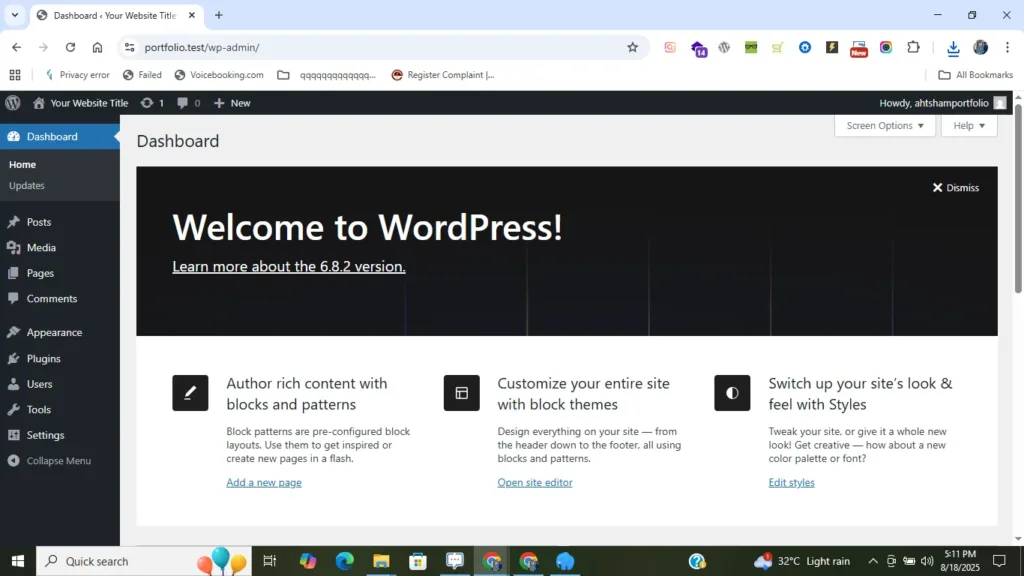
- i - Login to WordPress
Open your browser and go to your WordPress login URL. Enter your username and password to access the dashboard.
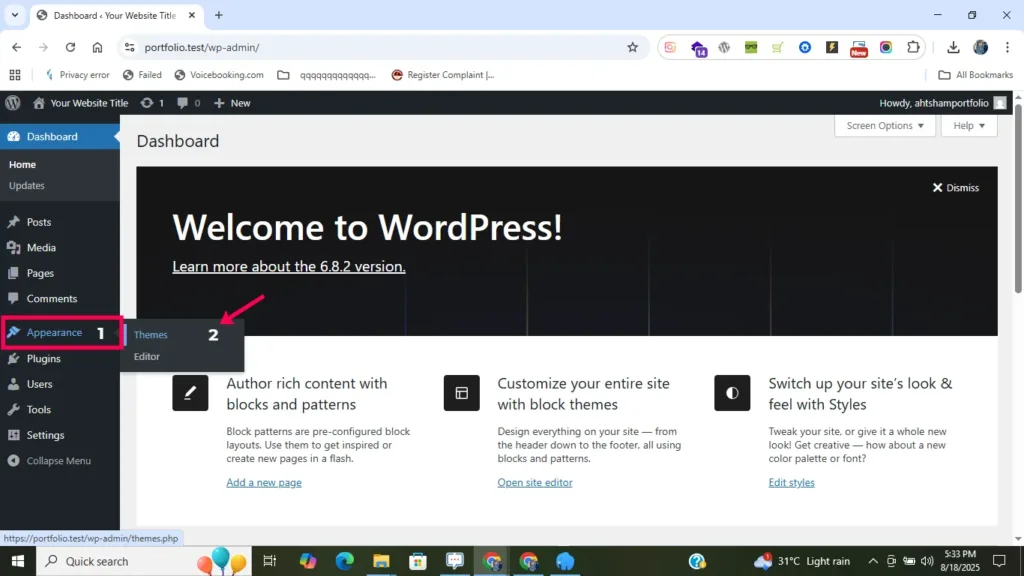
- ii - Find Theme Option
From the left sidebar in your WordPress dashboard, go to Appearance → Themes.
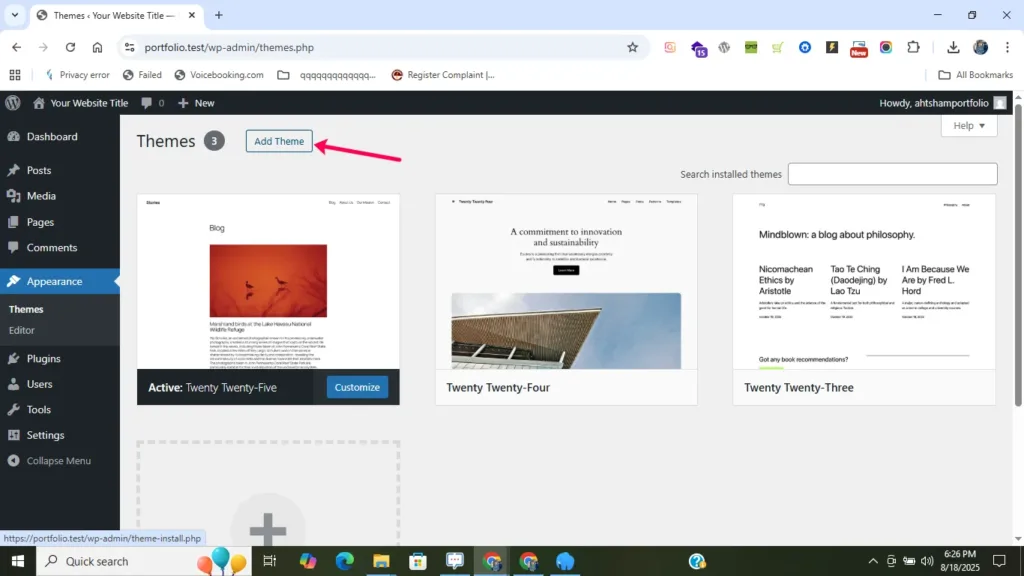
- iii - Add a New Theme
Click the “Add New Theme” button.
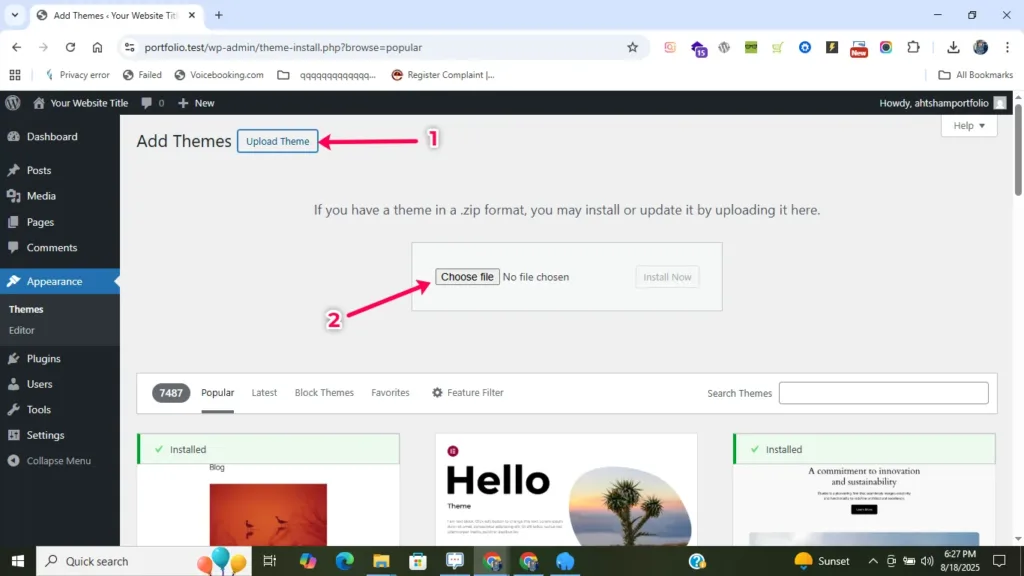
You can either:
Search for “Hello Elementor” in the search bar, OR Upload the theme manually.
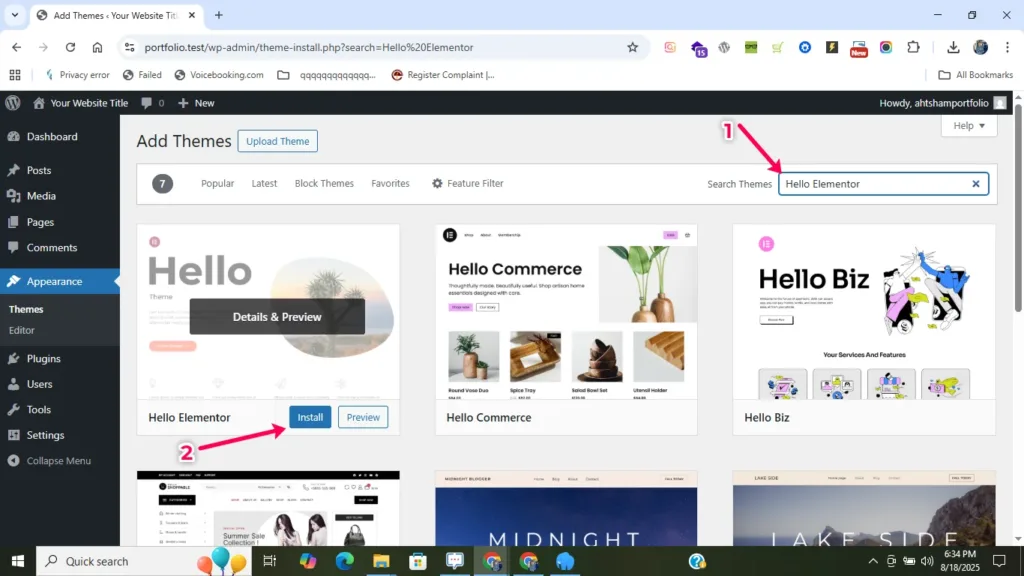
- iv - Search and Install Hello Elementor Theme
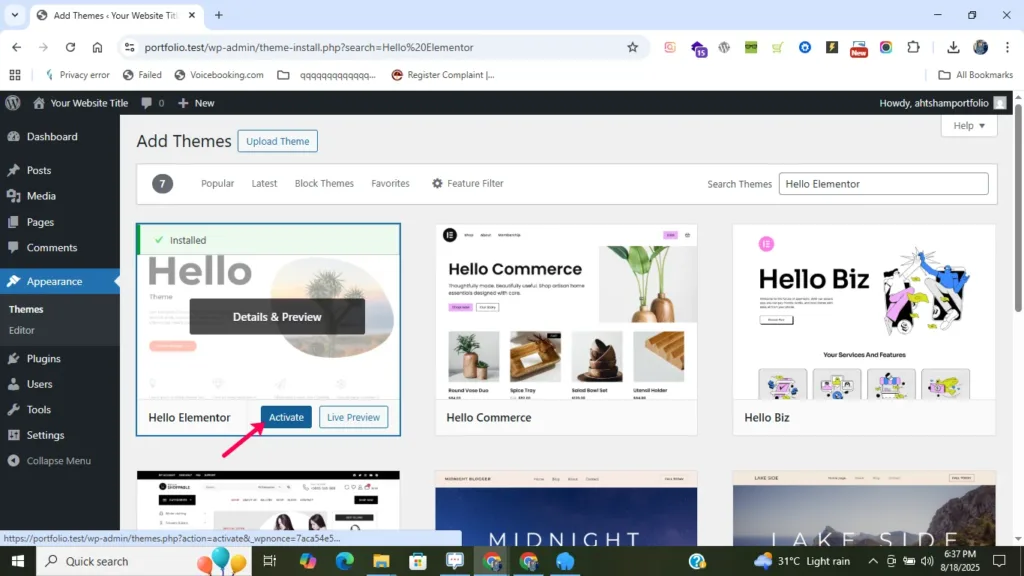
Type Hello Elementor in the search bar. Click Install and then Activate.
After Installed Active the Required theme
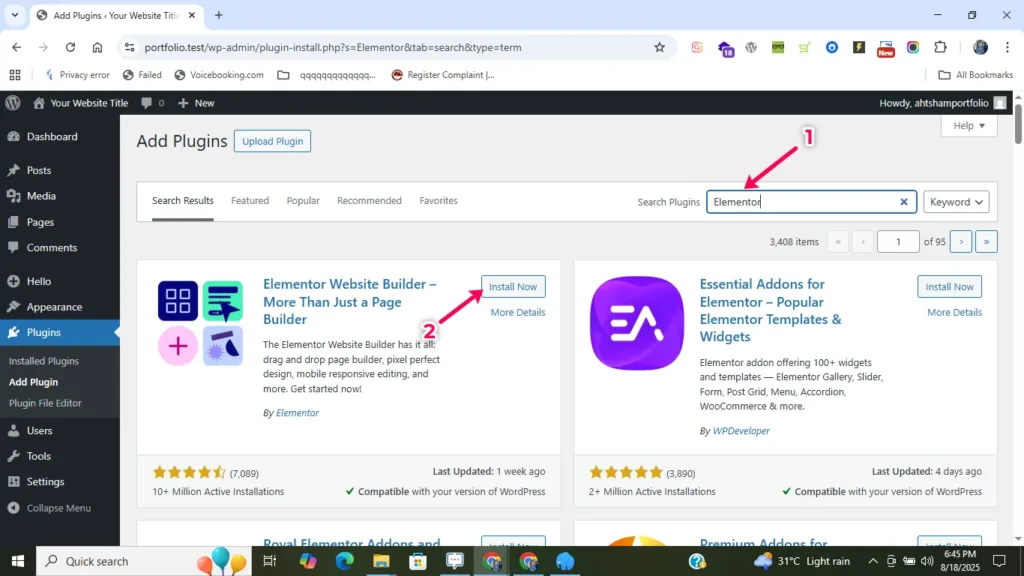
- v - Install Elementor Free Plugin
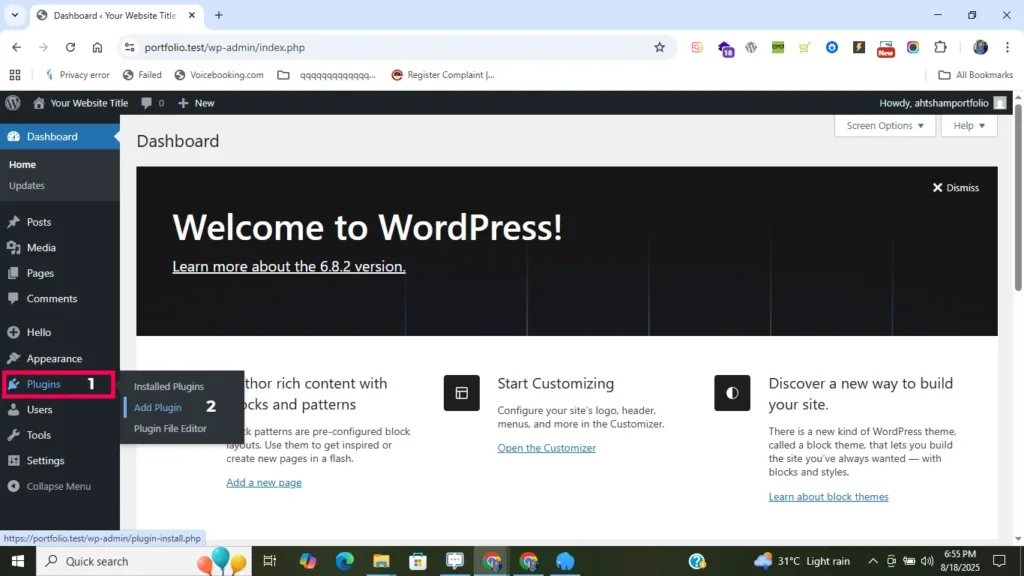
Go to Plugins → Add New. Search for Elementor Website Builder. Click Install and then Activate.
Add Plugin Manually
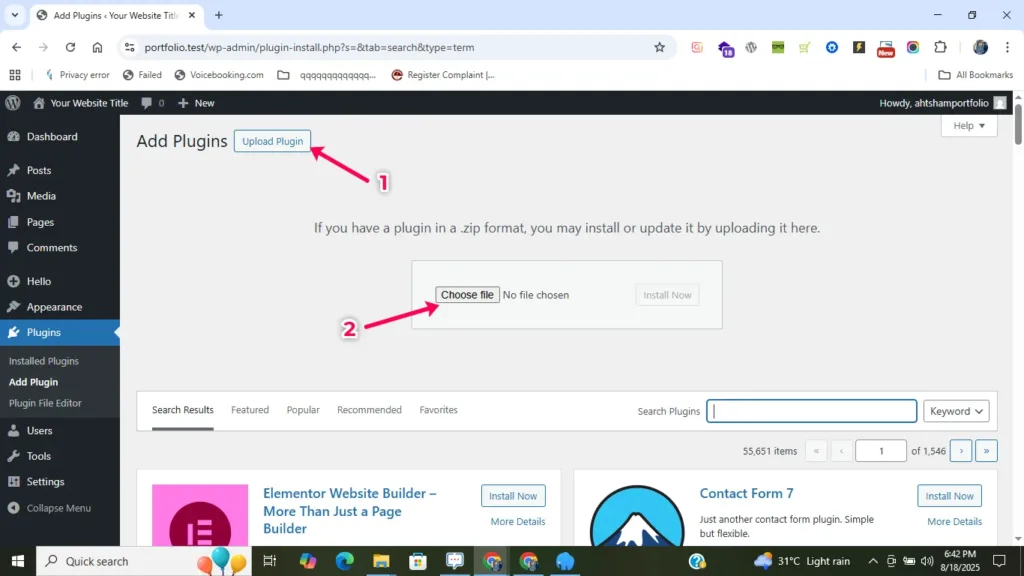
Search Required Plugin & Install Plugin
How to Install Elementor Plugin & Hello Elementor Theme in WordPress (Step by Step Guide)
- vi - Install Additional Plugins
- vii - Manage Plugins
From the plugin section, you can:
How to install, Update & Delete Worfpress Theme or plugins
Step 3: Create a Custom Header with Elementor
In this tutorial, I’ll show you how to build a custom header in WordPress using Elementor Free + Header & Footer Builder. This step-by-step guide in Urdu/Hindi will help you design a professional header with a logo, navigation menu, and call-to-action button.
📌 What You’ll Learn in This Video:
- How to open Header Builder in WordPress
- How to create and assign a new header template
- How to structure the hero/header section (outer + inner sections)
- How to add and style the logo section (40% width)
- How to add and style the logo section (40% width)
- How to add a navigation menu (center aligned)
- How to create a CTA button section
- How to manage header padding, alignment, and responsiveness
By the end of this video, you’ll have a fully functional custom header ready for your WordPress website.
- Timestamp
How to Create a Custom Header in WordPress with Elementor (Step by Step Guide)
Step 4: Design the Hero Section of Your Portfolio Website
Build a Hero Section in WordPress Portfolio Website | Elementor Tutorial
Want to design a stunning Hero Section for your WordPress portfolio website? 🚀
In this step-by-step tutorial, I’ll guide you on how to build and design a professional hero section using Elementor Free + Hello Elementor theme.
In this tutorial, you will learn:
- Hero section structure setup in Elementor
- How to add left and right columns (content + image)
- Adding a professional introduction with highlight text
- Adding counter boxes (Experience, Projects, Clients)
- Custom HTML + CSS highlight effect for text
- How to add a Call-to-Action button
Highlight Text Color Snippet
- HTML CODE
I'm a Freelance <span class="half-highlight">UI/UX Designer</span> and <span class="half-highlight">Developer</span>
- CSS CODE
					/* Text Highlight */
.half-highlight {
  position: relative;
  display: inline-block;
}
.half-highlight {
  background-image: linear-gradient(transparent 50%, #B83A3A4F);
  background-size: 100% 100%;
  background-repeat: no-repeat;
  padding: 0 .06em;
  -webkit-box-decoration-break: clone;
  box-decoration-break: clone;
}
- Timestamp
How to Create a Custom Header in WordPress with Elementor (Step by Step Guide)
Step 5: Build the About Me Section with Elementor
In this tutorial, I’ll show you step by step how to build a professional About Section in Elementor for your portfolio website. 🚀
We’ll design a stylish About Me layout including image, text, social icons, and CTA buttons — perfect for freelancers, designers, and developers who want to showcase their skills and personality.
👉 What You’ll Learn in This Video:
- How to create the About section layout in Elementor
- Adding your image with social media links
- Writing engaging About Me text for your portfolio
- Adding stylish buttons (Download CV, Hire Me, etc.)
- Custom HTML + CSS highlight effect for text
- Optimizing padding, margins, and section spacing
- Timestamp
How to Build About Section in Elementor | Portfolio Website Tutorial
Step 6: Design Portfolio & Call-to-Action (CTA) Section
Welcome to another video of our WordPress Portfolio Website Course in Urdu/Hindi.
In this step-by-step tutorial, you’ll learn how to design the Portfolio Section and CTA (Call to Action) Section using Elementor.
📌 In this video, we cover:
- How to create a Portfolio Section to showcase your work beautifully
- How to design a Call to Action Section that grabs attention
- Elementor tips to make your website modern and professional
- Step-by-step process in Urdu/Hindi for beginners
By the end of this video, you’ll have a fully functional portfolio and CTA section ready to use in your personal or client websites.
- Timestamp
How to Design Portfolio & Call to Action Section in Elementor | WordPress Portfolio Website
Step 7: Create a Blog Section in Elementor
A blog section helps you share knowledge, improve SEO and attract clients. In this video I’ll teach how to design a Blog Listing (archive) and a Single Post layout in Elementor — with featured images, excerpts, meta (author/date), Read More buttons, pagination, and an attractive sidebar CTA.
- How to create a Portfolio Section to showcase your work beautifully
- How to design a Call to Action Section that grabs attention
- Elementor tips to make your website modern and professional
- Step-by-step process in Urdu/Hindi for beginners
By the end of this video, you’ll have a fully functional portfolio and CTA section ready to use in your personal or client websites.
- Timestamp
How to Build & Design Blog Section in Elementor | WordPress Portfolio Website (Urdu/Hindi)
Step 8: Design Testimonial & Happy Clients Section
Learn how to design a professional Testimonials & Happy Clients section for your WordPress portfolio using Elementor. In this tutorial I show two easy methods — a recommended plugin-based carousel (fast) and a manual responsive card layout — so you can display client feedback, star ratings and client logos that build trust and conversions.
- How to create a Portfolio Section to showcase your work beautifully
- How to design a Call to Action Section that grabs attention
- Elementor tips to make your website modern and professional
- Step-by-step process in Urdu/Hindi for beginners
By the end of this video, you’ll have a fully functional portfolio and CTA section ready to use in your personal or client websites.
- Timestamp
How to Design testimonial & happy client Section in Elementor WordPress Portfolio Website
Step 9: Add a Contact Form with Contact Form 7
In this video, I’ll show you how to build and design a fully functional Contact Us section in WordPress using Elementor and Contact Form 7. This is a complete step-by-step guide in Urdu/Hindi for beginners who are creating a portfolio website.
👉 What you’ll learn in this tutorial:
- How to create a Portfolio Section to showcase your work beautifully
- How to design a Call to Action Section that grabs attention
- Elementor tips to make your website modern and professional
- Step-by-step process in Urdu/Hindi for beginners
By the end of this video, you’ll have a fully functional portfolio and CTA section ready to use in your personal or client websites.
- Timestamp
How to Build Contact Us Section in WordPress with Elementor + Contact Form 7 (Step by Step Guide)
Step 10: Build a Custom Footer for Your Portfolio Website
In this tutorial, you’ll learn how to make your WordPress portfolio website responsive for tablets and mobile devices using Elementor. We’ll go through each section — Header, Hero, About, Services, Testimonials, Contact, and Footer — to ensure your site looks perfect on every screen size.
- How to create a Portfolio Section to showcase your work beautifully
- How to design a Call to Action Section that grabs attention
- Elementor tips to make your website modern and professional
- Step-by-step process in Urdu/Hindi for beginners
By the end of this video, you’ll have a fully functional portfolio and CTA section ready to use in your personal or client websites.
- Timestamp
How to Build Contact Us Section in WordPress with Elementor + Contact Form 7 (Step by Step Guide)